Yesterday someone asked Xiao Bian, but I wouldn't get it if I wanted to install it, especially jumpers and switches. Even if I read the instructions, I would not learn it. Constrained by many different types of motherboards, Xiaobian today gives you a common method, you can quickly install the jumper switch, but do not have to read the instructions! Do not read the instructions! Do not read the instructions!

Chassis wiring 6 not!
Xiaobian must first say a jumper is not difficult! Many small partners in the installation, the installation of the parts is still easy, and finally to the chassis switch connection to make this difficult - the instructions on the drawing is very clear, but it will not be answered.
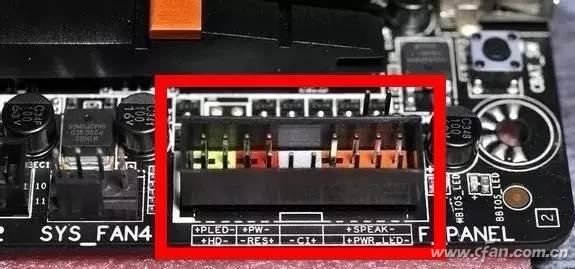
In fact, there is no need to look at the manual, some of the motherboards are more humane, and the different wirings are differentiated by colors. At the same time, the motherboard also prints logos, and some are not so clear and clear.
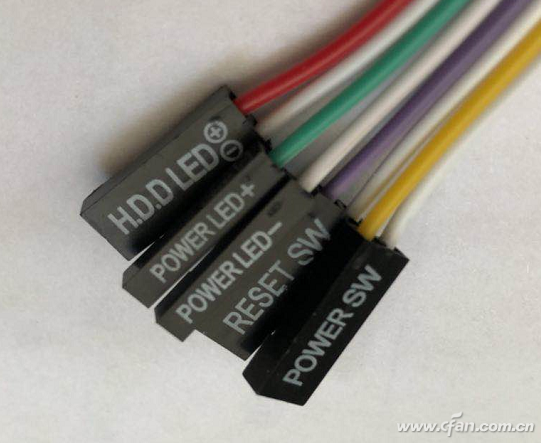
In addition to the main board, the chassis wiring is also a problem, Xiao Bian own line (custom switch line) marked very clearly, but some chassis in the wiring area, the write is not so detailed, especially the positive and negative signs, No one can take responsibility for the mistake.
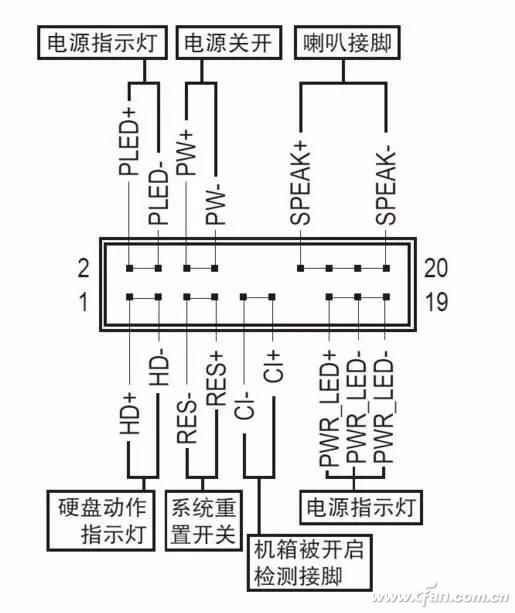
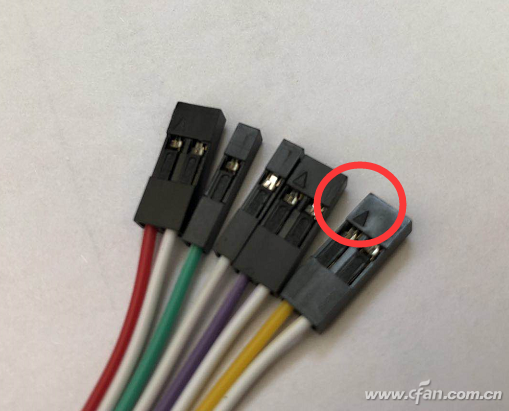
This is the most important part. Look at each corresponding switch position of the motherboard (there is a printed font), find the plus sign position of each group (such as switch), and then turn the chassis line in reverse. Is there a triangle in the labeling place? This triangle is the positive one. Insert it one by one and it is absolutely wrong! In other words, you don't need manuals at all, just look at which set of pins of each function of the main board is identified, and then turn the wire to the triangle to insert the positive polarity of the corresponding group.
Connector installed with 诀çª
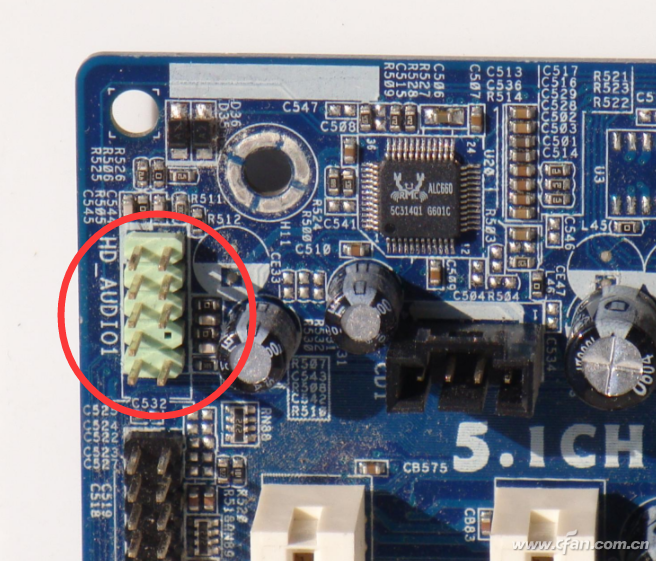
In addition to switch wiring, there is HD Audio, which is the front panel wiring. Xiao Bian specifically looked for a set of comparative photos. It can be seen that although they are all 9-pin connectors, the gap positions of HD Audio and USB are completely different.
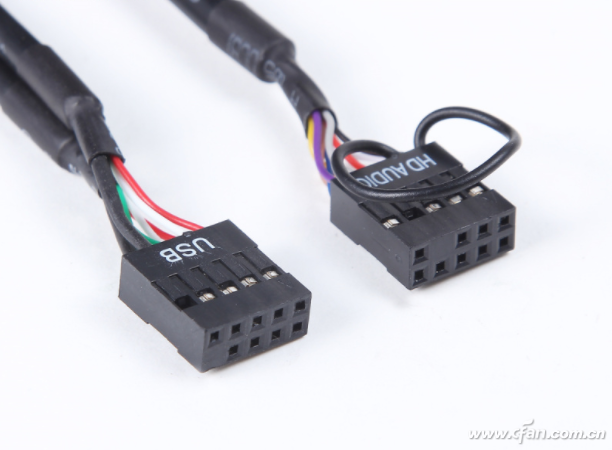
When installing, just find the second pin on the motherboard where there is no needle, no problem to insert into the interface, the same is true for the same USB 2.0, do not need to compare the instructions and do not need to carefully study the positive and negative, just align the pin 100% of the gap will not go wrong.
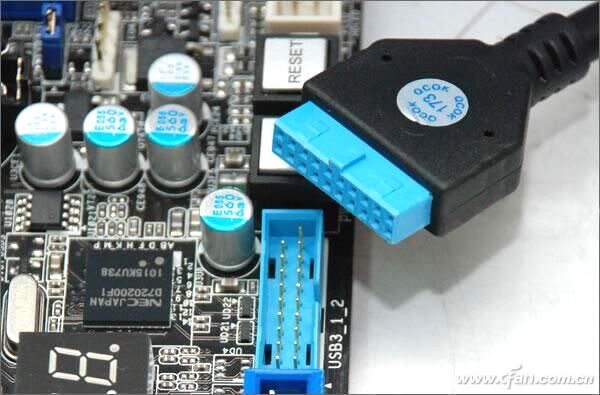
USB 3.0 this type of pin interface is a little different, it does not rely on the gap alignment method installed, but in the side there is a foolproof design foolproof, aligned fool-proof protruding installation will not go wrong . However, we must pay special attention to whether this is a USB 3.0 or USB 2.0 or even HD Audio interface. If it is a violent installation, it can be stuffed in. The consequences, of course, cannot be used, and it will damage the motherboard. This must be clear. !
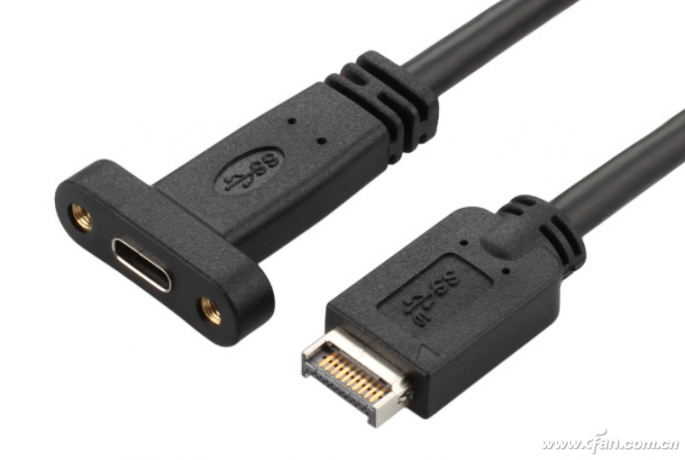
Another is that the newer motherboards are starting to provide USB 3.1 expansion connectors. This interface is a bit like the SATA installation and is different from USB 3.0. It also has a fool-proof design, as long as it is not a violent installation. There will be problems.
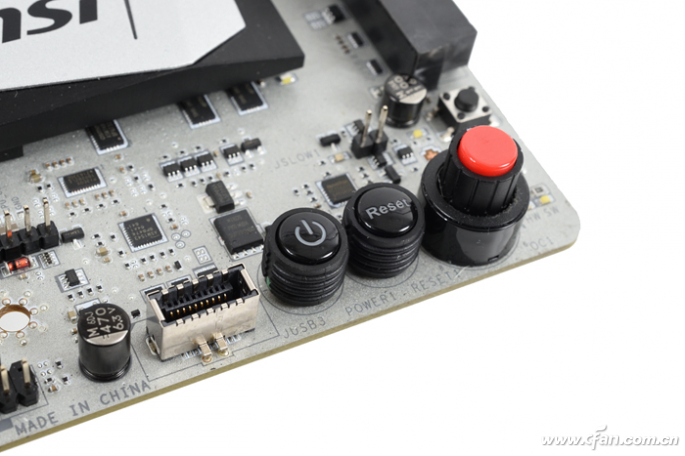
Moreover, when such a snap connector is correctly installed, the clip will have a “click†sound (the side of the clip spring on the side of the cable), so that it is convenient for everyone to judge whether the installation is in place or not.
In fact, the computer's various connector installations have certain auxiliary design. If you are skilled, you can completely separate from the manual installation. If it is the first time to install, remember that the small series will not be wrong. In short, we must be brave but careful, and brutal installation of violence is definitely not okay!